December 24, 2009

Eggless Orange Cake


I had too much of oranges at home, to be used up. Making juice is one good way to finish up more number of oranges at one go. I thought of cakes and did a search for orange cakes. I wanted a recipe where in orange juice is used and majority of the recipes I found had only the zest in it. Finally I found Shammi's Orange Cake. The feedback by those who have tried was encouraging. Hop over to her blog for more eggless baking recipes. I have changed some ingredients else its almost her recipe. I didn't do the filling. But decided to try my hand in icing the cake, which is a first for me. The amount of sugar and butter in the icing, puts me off, usually. Also me and my husband prefers cake with no frosting. My dad was here when I baked and he pushed me to do the icing. My dad really enjoyed the cake very much. While slicing the cake, I did in a hurried manner and the top slice cracked but managed to keep it whole. I know I have much more to go on the icing part. But for a first timer, I think it will get a pass.


Ingredients


Whole wheat flour - 1 cup

All pupose flour/Maida - 1/2 cup

Cornflour - 2 tspn

Baking powder - 2 tspn

Salt -1/4 tspn


Oil - 1/2 cup

Sugar - 3/4 cup

Yogurt -1/4 cup

Orange zest - 1 tspn

Fresh orange juice - 3/4 cup ( from 3 ornages)

Orange color a pinch


Method

Sift the dry ingredients - wheat flour, maida, cornflour, baking powder and salt.

Cream sugar and oil. Add yogurt. Beat well. Add a pinch of orange color.

Add the flour mix and orange juice alternatively to the wet mix. Mix well after each addition.

Finally stir in the orange zest.

Transfer the batter to a greased and dusted cake tin. Bake in a preheated oven at 180 C for 30 minutes.

The cake on its own also tastes very nice. You can just dust it with some powdered sugar and serve.


Frosting

Butter - 1/2 cup

Powdered sugar - 1 1/2 cup

Corn flour - 2 tblspn


Beat all the ingredients together till creamy. Cool the cake well and slice it horizontally.  Spread the frosting on the base slice. Carefully place the top slice over it. In the remaining  frosting, add a pinch of orange color. Cover the cake fully with the frosting. Leave it to set and slice.


Wishing all my readers A Merry Christmas.


December 23, 2009

Dal Kachori

Kachori is a popular snack in the North India similar to what is bajji/vada to South India. This deep fried snack is a round ball which has a flaky covering made of maida flour with a spicy, dry filling of urad dal/moong dal. There are many variations to the fillings. Fillings can be made according to one's choice and taste. I first tasted kachori at Janpath market during first visit to Delhi. We were feeling hungry and I told my sister that I need to eat first before I can shop any more. It was then my brother-in-law suggested Kachoris and a vendor was just near us in his bicyle. Kachoris was served in the leaf bowls along with a potato gravy. First bite, I just loved it. Seeing the size of the kachori, I thought I can have only one but finished with 3. It was absolutely tasty. After that, my husband used to get this from a North Indian bakery near his office.  Once I decided to give it a try. I used half and half of maida and wheat flour instead of using only maida. Inspite of using atta, the outer cover was flaky.  I got decent kachoris if not the best. 


For outer cover

All pupose flour/Maida - 1 cup
Wheat flour/Atta - 1 cup
Ghee - 2 tblspn ( Don't melt the ghee)
Cold water - 3 tblspn
Salt
Ajwain - 1 tpsn

Mix flour,ghee, salt and ajwain till the flour resembles bread crumbs. Slowly add water to make a dry dough. Don't knead it. Just bring together the flour and make a dough. This is essential to get the flaky crust. Cover and keep it aside for 30 minutes.


Filling

Urad dal - 4 tblspn
Cumin - 1 tspn
Fennel seeds - 1 tblspn
Green chilly - 2 nos
Red chilli powder -1/2 tspn
Coriander + mint - a handful
amchur powder - 1/2 tspn

Oil for deep frying


Method

Soak urad dal in hot water for half an hour. Else you can soak it in cold water for 2 hours.
Drain the urad dal and grind it coarsely with out adding water.

Roast cumin, fennel seeds for a minute. Roast green chilly , coriander and mint in a teaspoon of oil till the leaves wilt.

Grind the roasted ingredients along with salt, red chilli powder with out water. Mix the ground masala to the urad dal paste. Heat a tablespoon of oil and saute the filling. Don't make it dry, it should be moist.


Preparing the kachori

Pinch off a lime sized dough. Press the dough with your fingers to the shape of a poori. Let theedge of the poori be thin compared to the centre.  Place a tablespoon of the filling. Gather the edges and shape into kachoris. Heat oil in a kadai till hot. Lower the heat to medium and deep fry the kachoris till golden brown. Serve with mint chutney or sweet tamarind chutney.


This is off to WYF:Tea Time Snacks hosted by EC.


December 18, 2009

Eggless Banana Chocolate Cake

In baking, I am trying to  do away with all purpose flour completely. I decided to try a whole wheat cake. I used half cup of wheat flour and 1/2 cup of multigrain flour. The pillsbury brand has come out with a mutligrain flour that has 80 % of atta and 20% of soy, oats, maize, ragi, chana dal and barley together. Since I had that flour in hand, I decided to try that in baking, again thanks to Madhuram's whole grain baking series. And in my attempt to make it healthy, I omitted white sugar and used  brown sugar and  honey. Considering the less amount of oil, the cake was very moist. All in all this is a keeper recipe. I will be trying with coffee flavor soon.


You need

Whole wheat flour - 1/2 cup


Multigrain flour - 1/2 cup

Arrowroot powder - 4 tblspn ( you can use corn flour)

Cocoa powder - 4 tblspn

Baking powder ,baking soda - 1 tspn each


Mashed banana - 1 cup

Brown sugar - 4 tblspn

Honey - 3 tblspn

Oil - 1/3 cup

Milk - 1/2 cup + 2 tblspn

Yogurt - 2 tblspn

Vanilla essence - 1/2 tspn

Cashew nuts to garnish - optional


Method

Sift the fry ingredients together - Atta, multigrain flour, arrow root powder, coco powder, baking powder and cooking soda.


Mix banana, brown sugar and honey well. It smells like Panchamritam. Add milk and whisk till blended, followed by yogurt. Finally add oil and vanilla essence. Beat till everything is blended nicely.


Fold in the dry ingredients into the wet mix, mixing after each addition. Transfer to a greased baking tin. I usually dust the greased with some flour before transferring the batter.  Garnish with few cashews on top. If you wish you can add some to the batter too.


Bake in a preheated oven at 180 C for 35 minutes or till a skewer inserted comes out clean. I baked at 200 C. The top cracked.

The cake was very moist and spongy. Perfect sponge cake with chocolate flavor and no hint of banana. For those who you like the cake to be sweet, you can increase the sugar by 2 tablespoon.


This is off to Divya's Show Me Your Cake and  Sara's Cakes n Cookies event.


December 15, 2009

Chegodilu /Ring Murkku for ICC

Srivalli challenged the bloggers with the chegodilu/ ring murkku as part of the Indian Cooking Challenge. I have tasted the ring murkku from TamilNadu. I haven't tried this nor do I have a recipe for the same. So when Srivalli announced the challenge, I was happy to try a new savory. My dad loves to help me in the kitchen expecially when making sweets/savories. Appa knows the paakam of sweeets very well. But he cannot make any dish on his own, that is another thing. His judgement will always be right with respect to paakam. Also he will help in deep frying the savories. This time, he helped me in making the rings.

Srivalli gave two recipes to choose from. I opted to try the first one. The preparation of the dough was new to me in a savory recipe. I have never cooked the flour for a savory dish. The mrukku came out very crisp and crunchy. I used 1 1/2 cups of fresh rice flour. 


Ingredients Needed:


Rice Flour - 1 cup

Water - 1 cup

Split Yellow Moong dal /  Pasiparuppu - 1 1/2 - 2 tblsp

Cumin Seeds - 1 tsp

Sesame Seeds - 1 tsp

Chili powder - 1 tsp

Ghee or oil - 1 tblsp

Salt to taste

Oil for deep frying


Method to prepare:


Making the dough:


Soak moong dal in water for half hour to 1 hour.


In a deep bottom pan, boil water, then add salt, ghee and moong dal. Bring it to boil, simmer and slowly add the rice flour. Using a ladle, mix the flour with water by stirring it well. When the flour is mixed and done, turn off the heat immediately. Cover with lid and keep aside for 10 to 15 mins.


Once the dough is cool, add chilli powder, sesame seeds, cumin seeds and mix well. Knead till you get a smooth dough. Adjust the salt and spice depending on your preference. When using fresh flour, you will have to knead more to break the lumps. Though I kneaded well, I could find some after deep frying. But it didnot affect the texture since those lumps were very small and got fried well.


Frying the Chokodi:

Heat a pan with oil, enough to fry 3 -4 at time, if you conscious of not using too much oil. Simmer once it gets hot. The temperature should not be smoking hot.


Grease your fingers with oil and pinch out a small lemon size ball and roll between your palms to form a thick rope. Bring the two ends to together and press to form a rope. Ensure the ends are firmed pressed as not to give out during frying.


Continue with the rest of the dough until you are done with the entire batch. You can either cover it with a plate or a cloth to prevent the dough from getting dried.


December 14, 2009

Eggless Plain Vanilla Cupcakes

About an year back,I had bookmarked the recipe for Basic Yellow Cupcakes at Wilton's. I was new to baking then and tried only eggless recipes. Things have changed much now that I have adapted many recipes to make it eggless, thanks to blogging that I know about various egg substitutes and a special thanks to Madhuram and her many eggless events. I thought of increasing the milk quantity in the above said recipe to make it eggless. But as I said, I wasn't very sure of the outcome. At the same time around, Aparna, posted an eggless version of the same recipe. Her post gave me the confidence to go ahead and I followed her recipe to T. It was absolutely delicious and very easy to put together. As the recipe says, its a basic version. You can jazz it up to any kind of flavor you wish to. I have baked it many times with chocolate and coffee flavors.  Its a keeper recipe.


Ingredients

All purpose flour/maida - 3 cups

Cornflour - 3 tspn (I used arrowroot powder)

Salt - 1/2 tspn

Baking powder - 2 1/2 tspn

Butter - 1/2 cup

Sugar - 1 1/2 cups

Milk - 1 1/2 cups

Vanilla essence - 11/2 tspn

Mini chocolate chips for topping.


Method


Cream together sugar and butter till fluffy and light. Sift both flour, baking powder and salt. Add vanilla essence to milk.


Add milk and flour mix alternatively to the creamed butter-sugar combo. Beat well after each addition. Once you have done with both milk and flour, beat well for over a minute.

Grease the muffin tray and spoon the batter to 2/3 of the depressions. Add the topping.  Sliced cherries or tuty fruity can also be used as topping. Bake at 180 C for 30 minutes.


I got 18 muffins when I made the first time. Later on I  make only half the recipe. Last time when I made, I filled the muffin pan to half and had some batter left. I baked it in a jelly mould. Here is it


Here is the picture of  coffee flavored cupcakes. I used 1 1/4 cup milk and 1/4 cup of coffee decotion in place of 1 1/2 cups of milk in the orginal recipe.


December 9, 2009

Poha BisiBeleBath

During our last trip to Mumbai, we made it to Shirdi too. On our return trip to Mumbai from Shirdi, we travelled by the day bus and reached my uncle's house at 10 p.m. We were all tired by the journey and just wanted to have some curd rice (That's the comfort meal especially after a tiresome journey) and hit the bed right away. Our bus was expected to reach by 8:30 p.m. Lalitha mami had made bisibele bath (BBB) and curd rice for dinner. As I said we were in no mood to relish BBB. On first look, the texture of BBB was different and with the taste of the first morsel, I asked what went in the BBB. It was made of poha. Poha has blended in well. I felt BBB with poha was light on stomach too. Here is my version of it with poha. I have followed the same method as I did with broken wheat before.


I washed and pressure cooked poha for 2 whistle. Just add enough water to moisten the poha. Take care to use the thick variety of poha.  Else it will get dissolved on cooking. I used the thick brown variety which is more nutritious too.


I used two cups of poha. Rest of the ingredients are same. The quantity was enough to serve 4. On my first attempt I didnot pressure cook the poha. I soaked it for 15 minutes and drained it. I mixed it along with the veggies and cooked. I felt the poha was dry and not soft and the pressure cooked method gives soft poha and it blends well. You can choose to MW also.


December 5, 2009

Pineapple Kesari

I can't remember how many times I have made kesari at home. Everytime, when my hsuband has the sweet craving (that craving is there almost daily) and there isn't anything near to sweet to munch on, he will ask me to make kesari. Then the quantity I make will be very less. that is just one serving for two. When the whole of my neigborhood must be getting ready to hit the bed, I will be busy in the kitchen making kesari. When you are making in small quantities, its very easy, much easier than making upma, since no chopping involved here. On one such night, when I set out to make kesari, the pineapple on my kitchen caught my attention. I have heard of pineapple kesari a lot but never tried it. Decided it was pineapple kesari that day. Chopped the pineapple into bite sized pieces and used a cup of it for the kesari. I have heard many people cribbing at the thought of cutting a pineapple. I have never found it difficult. The remaining pineapple was used for making jam. I followed my usual way of making kesari with the addition of the pineapple chunks in it. I just increased the water and sugar quantity to make up for the addition of the pineapple.


You need


Roasted rava/semolina - 1 cup

Sugar -2 1/4 cups ( increase 1/4 cup more depending on the sweetness of pineapple)

Water - 2 1/2 cups

Yellow food color -a pinch. ( Can use turmeric powder too)

Ghee - 1/2- 1 cup

Cardamom powder - 1 tspn


I usually roast rava as soon as I buy them from store. If not roasted, dry roast rava till light pink. You get roasted rava too from the stores.


Heat a kadai, add measured water with a pinch of food color. When water starts boiling, add the pienapple pieces. After a minute or so, add rava and mix well. Let the rava cook and by then the water will be fully absorbed. Add sugar. The sugar will melt and the mixture will turn runny. Mix well and take care to break the lumps if any. Slowly add ghee at intervals. The kesari will take a glossy sheen and will leave the sides of the pan. It tastes beest when served cold. You can press it down on a greased plate and cut into desired shape while warm.  Loved the hint of pineapple in the kesari.


Note: If you don't want to bite into the pineapple pieces, you can give a run in the food processor or mixer and then add for a smooth texture. You can add roasted cashews too.


I am sending this to Sanghi's FIL event which features Fruits for the current month


December 2, 2009

Karthikai Deepam


Hope all of you who celebrates 
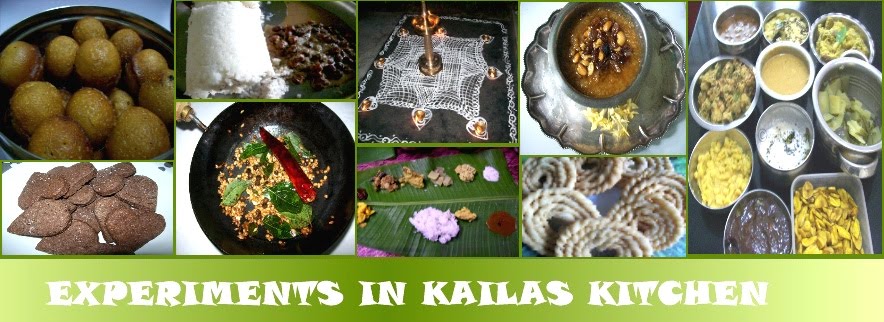
Karthigai Deepam had a lovely celebration.  Karthikai, is the festival of lights can be explained as a combination of Raksha Bandan and Diwali, for the uninitiated. The lamps are lit for the well being of one's brothers. Small earthen lamps/brass lamps are lit in the front yard and placed on rangoli/kolam. The brass lamps are usually given to a girl as part of the wedding trousseau. In Kerala, only  the iyers celebrate the festival. In my neighborhood, others also join the celebration by lighting the lamps in their front yard, though they don't prepare any festive goodies as we do. So the whole street is a sight to behold. Neiappam, pori and Adai with vennai is the usual neivadyam. I made all the three.


Diced coconut is a common ingredient for all the three dishes. Fresh coconut is sliced as thin strips. The strips are then cut into bite sized pieces. I used half of a fresh coconut. The credit for equal sized pieces goes to my Dad.


Neiappam

As the name suggests, Nei is ghee. These sweetened rice balls are fried in ghee in a special pan which has depressions. I have used half and half of ghee and oil. There are many ways to prepare the batter. I have been following this way. 

Ingredients

Raw rice /pacharisi - 1 cup
Jaggery - 1 cup
cardamom powder - 1 tblspn
Half of a banana
Diced coconut pieces - 2 tblspn

Ghee/oil to fry


Wash and soak raw rice for 8 hours. More soaking helps in getting softer appams.  Drain the water. Powder the jaggery. Grind together jaggery and rice to a smooth paste. Add the banana too. Don't add water while grinding. If you are using more rice quantity, then you can use the wet grinder instead of the mixer grinder. Since we are grinding without water, your mixer grinder will get heated up fast and it will take more time to prepare the batter. Stir in the coconut pieces and cardamom powder. The batter consistency should be that of  idli batter. If it is too thick, adjust by adding water. Give a good stir everytime you scoop the batter into the pan.


Heat the appam pan. Fill ghee/oil to 1/2 the level of the depressions. When it is hot, drop spoonfuls of batter into the depression. Cook in moderate heat, so that the inside also gets cooked and you get a lovely golden color. After a minute, gently turn them upside down. Don't wait for the downside to get cooked well. When you do  like this, the uncooked batter flows outside on turning and a similar appam is formed on the flip side. So you will get an appam which looks like one is placed on top of the other. This is not easy as it is written.

Everytime I start making, I try to get this effect. But by the time, my appam pan is set and I get the drift, the batter will be over. I must confess I usually make appam only as part of any festive fare. I always think of making it on other days for the sake of practise. It never seems to happen. Don't bother too much if you are not getting it, this has nothing to do with the taste of the appam. It only contributes to the looks factor.


After a batch, check the oil in the depressions and add if required. If you add oil, wait for it to get hot before starting with the next batch.


Aval pori in jaggery syrup

My mom used to make nel pori  for Kathikai. My MIL makes aval pori (fried beaten rice flakes). In the place where I stay, everyone seems to make aval pori only since the vendors bring that and less quantity of nel pori. And personally I favor aval pori. My amma's measurement is in terms of edangazhi (measuring vessel) and achu ( jaggery blocks). Her version is for 1 edangazhi (approx 1 litre)  pori, 10-12 achu vellam (jaggery block) depending on the size of the block. Based on her measurement, I have a an easier measurement, ie for 5 measures of pori, 1 measure of powdered jaggery. That works fine for me. Measure the pori with a cup or bowl. With the same bowl measure out the jaggery also. The  jaggery syrup consistency is very important, since it helps to retain the crispness of the pori after coating in the syrup.


Ingredients

Pori - 5 measures
Jaggery - 1 measure
cardamom powder - 1 tblpsn
diced coconut pieces - handful

Method
Melt the jaggery with just enough water for it to melt. Strain and heat the melted jaggery. The syrup consistecy is 'kallu pakam'. Its the next stage of soft ball consistency. You drop a teaspoon of the syrup in half cup water and roll it into a ball. When you drop the ball, you should be able to hear the sound of it hitting the surface. If the syrup has attained the consistency, switch off the heat. Stir in the cardamom powder and coconut pieces. Slowly stir in the pori, gently giving a mix while adding. turn the pori well so that it gets coated in the syrup. While warm, you can roll into balls. When you are making in small quantity, its easy to roll. I made nearly half a kilogram of pori. So i made just few balls and left the rest as it is.


Adai


The recipe of karthikai adai is slightly different than the one prepared usually at home. Since it is offered as neivedyam only raw rice is used. That is boiled rice is avoided completely thought its used only in minimal quantity otherwise too. Pepper corns and jeera/cumin is added while preparing the batter. It surely gives a nice flavor. Also the diced coconuts are added too. It is offered along with home made butter.


November 27, 2009

Ashoka Halwa /Moong Dal Halwa

 I was watching a travel show in a Malayalam channel. The hostess takes the viewers through a culinary journey. In one episode, the recipe was Ashoka halwa and the cooking episode is shot at a normal house and cooked by the lady of that house. That aunty mentioned it was famous in Thiruvaiyar/Tanjore area. And its also called as Thiruvaiyar Halwa similar to the halwa of Tirunelveli. Ashoka halwa is made using moong dal and its lot simpler to make. Watching the episode, I was tempted to make it immediately and made a mental note of the ingredients and measurements. I have made it long time back and the recipe was missing in my book. The aunty who made it was mostly eyeballing the measurements. Considering her age, she must be quite experienced in making it and she doesn't need cups and spoons as we swear by. The hostess tried to get across the measurements partially in weight and cups.


This is how I went about doing it.

Moon dal - 1/2 cup

Sugar - 1 1/2 cups

Maida - 1/4 cup

Wheat flour -1/4 cup

Ghee- 1/2 cup

Caradamom powder - 1 tspn

Red food color - a pinch

Cashew nuts - 10 nos


Method
Dry roast the moong dal till light brown. I usually roast the dal before storing them. Wash and pressure cook in 1 1/2 cups of water for 2 whistles. Mash the cooked dal well. There will not be excess water in the cooked dal.


Heat a kadai with a tablespoon of ghee. Roast cashewnuts to golden brown. Drain them and roast both maida and wheat flour separately for few minutes. Keep them aside. In the same kadai, mix cooked and mashed dal and sugar. Heat the mixture. When it starts bubbling, slowly stir in both the flours and a pinch of red color. Add ghee at intervals. When the whole mixture comes together and starts leaving the sides, remove from fire. Add roasted cashewnuts and cardamom and give a good stir. 
 
This halwa is not very sweet and with comparitively less amount of ghee used, its not dripping with ghee kind.


This Tanjore special is joining the WYF: Speciality food  hosted by EC


November 25, 2009

Besan Ka Chilla from TT for T & T

Planning breakfast is a big deal for me. Bread, cornfalkes or other cereals doesn't qualify for breakfast at home. It has to be the Dosa, idli kind. Hope you got the idea. I am not the kind who has the dosa/idly batter stocked up in the fridge at any time. I grind for idli/dosa only once in 10 days. I get bored of dosa and idly very soon. When there is no batter for any kind of dosa (appam/set dosa etc), instant breakfast comes handy. On one such day, I didn't have many of the ingredients needed to whip up an instant breakfast like rava,semiya, rice flour etc. I remembered about the Besan Ka Chilla at Tongue Ticklers. All you need is besan flour and some spices to flavor it up. No fermentation required.


Harini has soaked bengal gram dal and made a batter of it. As I said, I was looking for an instant option, I used the bengal gram flour.


You need

Bengal gram flour/besan - 2 cups

Red chilli powder - 1/2 tspn

Grated ginger, coconut and finely chopped onions - a tblspn of each

Salt to taste

Water to prepare the batter

Oil
Method

Mix all the dry ingredients together and add water. Whisk well to get a lump free batter. The consistency should be similar to the usual dosa.

Heat a skillet. When moderately hot, take a ladle of the batter and spread it like dosa. Don't make it too thin. Slightly thicker dosa gives a nice texture to it. Flip and cook the other side too. Serve with chutney or molagapodi. I served with onion chutney.


For onion chutney

Onions - 2 medium sized

Red chilly - 2 nos

Chana dal - 1 tblspn

Grated coconut - 2 tblspn

Tamarind - a small bit

salt

Oil- 1 tblspn


Roast chana dal and red chilly in a tablespoon of oil. Remove and saute the onion in the remaining oil. When cool, grind all the ingredients together. Add water to get the desired consistency.

The measurements for the chutney are indicative. Little more or less will not do any harm. I always eyeball the measurements and in turn the chutney tastes different each time. You can even add few sprigs of curry leaves or coriander or mint too.

Check Harini's has kids friendly version  of the chilla here.
This is off to T&T hosted by Raaga, an event started by Zlamushka, where the spot light is on Tongue Ticklers this month.


November 23, 2009

Honey Gooseberries- Indian gooseberries soaked in sugar-honey syrup


Gooseberries/Nellikkai/Amla are rich source of Vitamin C. The gooseberry from an integral part of various traditional home remedies and is an essential ingreident in most of the Ayurveda medicines. The gooseberry fruit contains as much as 20 times of vitamin C as that in an orange. Iron in the food is best absorbed when taken in combination of food containing Vitamin C. In that scenario, honey and gooseberries form a perfect pair.  I first saw gooseberries soaked in honey at Wayanad.   At first, I did not know that it was soaked in honey. When I saw similar jars at different tourist spots, I asked the cab driver and he enlightened me on that. I jusst bought two pieces to taste it. I loved it. From then on, I wanted to try it at home. But did not search for a recipe though. It was in the back of mind.  Later I found it in Meenakshi Ammal's Samaithupar Part II.


When I was preparing the post I googled to find the benefits of Goosberry to include as part of  the post. I found a recipe for honey berries. I felt it more healthy with out the addition of sugar and think these are the kind I had at Wayanad.

The gooseberry can be preserved using honey, and thus used throughout the year. Take required number of gooseberries and clean them in running water. Pierce the gooseberries using a sharp stainless steel edge at various spots. Now immerse these pierced gooseberries in a jar full of pure honey. Cover the mouth of the jar using fine white cloth and place the jar in sunlight for an hour for 15 days. 

A tablespoon each of fresh gooseberry juice and honey mixed together forms a very effective medicine for several ailments. Its regular use will promote vigor in the body within a few days. When fresh fruit is not available, dry powder can be mixed with honey.

For more info on gooseberries and how it can be used as home remedies, check here.

While writing the post, I am reminded of a popular Malayalam saying -
"Moothavar chollum muthunellikkayum Aadhyam Kayakkum, Pinne Mathurikkum "
(à´®ൂà´¤്തവര്‍ à´šൊà´²്à´²ും à´®ുà´¤ുà´¨െà´²്à´²ിà´•്à´•à´¯ും ആദ്à´¯ം കയക്à´•ും à´ªിà´¨്à´¨െ മധുà´°ിà´•്à´•ും).
It translates as "Both elders's advice and goosebrries will taste bitter at first but will turn to be sweet later ". Have you tried drinking water after a bite of gooseberry. If not, try it. Then you will understand the meaning of the above.


Now on to  the recipe I followed.

You need

Gooseberries - 1 heaped cup

Sugar 3/4 cup

Water - 1/4 cup

Honey - 2 tblspn

Cardamom - apinch


Method

Wash and dry the berries. Prick with a skewer/toothpick at few places on each berry.  Prepare sugar syrup. When the syrup is sticky, i.e. prior to one thread consistency, add the berries and turn well. The moisture released from the berries will make the syrup thin. Continue cooking till the syrup attains the one thread consistency. Add honey and cardamom powder. Cook for 2 minutes and remove from fire. Cool and store in dry glass jar.

Since the berries are also cooked, it gets soaked faster. You can eat the berries the next day itself. But as it ages, it gets more soft and tastes better with soaking. You drizzle the syrup on poories, rotis or bread too. The syrup tastes delicious with the juice of the gooseberries blended in.


November 19, 2009

Carrot Halwa ~ A popular winter dessert

My appa is here with us for a short stay, from Gurgaon. Among the list of items to be sent through Appa, I asked Amma to send some carrots too. Yes the red, juicy Delhi carrots. Those variety is hard to get in my place. You guessed it right, I wanted to make carrot halwa. Its long time since I tasted halwa made with the red carrots. I made a batch on the same day Appa arrived.

Appa likes to chop veggies and during his stay, I am relieved of that job. I am not the kind of person who is ready to entrust the veggie chopping to anybody who offers to do the same. But Appa insists on doing it. And needless to say he grated the carrots. Half the job is done. I proceeded with the cooking. I made in two batches on different days. On the first day, I cooked the carrot in MW and rest of the process on stove top. The next day, I made it entirely in the microwave oven. I did not find MW making the job easier. The time taken was almost the same. May be a gain of 10 minutes or so in the MW. But opening the MW door, carefully taking the glass bowl and giving a stir at regular intervals, made me feel stove top is the better method. I shall give how I did bothways.


Ingredients

Grated carrot - 3 cups

Milk - 1 cup

Sugar - 1 cup

Ghee 3 tblspn

Cardamom powder - 1 tspn

Cashew/raisins - 10 each


Method

Grate the carrot using the large eyed grater. This will ensure the carrots don't get cooked mushy. And you will be able to bite into the pieces while you eat. But if you prefer a softer kind of halwa, grate it fine.

Cook grated carrot and milk in pressure cooker for one whistle. Or it can be cooked on stove top, till the carrot is fork tender and the milk is almost dried up. I cooked it in MW for 8 mimutes. In the kadai, heat a tablespoon of ghee and fry the cashews and raisins. Transfer the cooked carrot along with milk to a thick bottomed vessel of kadai. Stir in sugar and continue cooking for low flame. Keep giving a stir now and then. When the milk and sugar is fully absorbed by the carrots, add ghee and powdered cardamom. The mixture should not turn too dry but should be moist. Finally garnish with fried cashews and raisins.

Serve warm, ideally with a scoop of vanilla icecream.


Microwave method

Cook carrot and milk for 8 minutes. Stir in sugar and cook for 20 minutes. Give a stir at 5 minute intervals. Add ghee and cardamom and cook for 6 minutes. Garnish with fried cashews and raisins. I have used carrot, milk and sugar in the ratio 3:1:1. If you want it to be sweeter, you can increase the sugar by 1/4 cup.


November 15, 2009

Gulab Jamuns ~ For October ICC


Sweet and juicy gulab jamun is the chosen recipe for October ICC. In this age of instant mix available to make them, Srivalli chose to do it from scratch. So we were required to make the Khova at home. The earlier posting date for ICC was last day of the month. After the over dose of Diwali sweets, I wanted to stay away from sweets for the rest of the month ( i.e only around 10 days). For sweet tooth like us, thats a long period. At first I had thoughts of giving this month's challenge a miss. On the other hand, I wanted to make it too. So I casually mentioned to my husband about the month's challenge and my thoughts of not doing it. He suggested making in small quanity and that was the gentle push needed and I went ahead with the preparation. Infact the day after I made, Srivalli mailed the challengers informing the change in posting date ie its going to be the 15th of every month. So that gave extra two weeks for us. But I had already made.


Out of the three recipe, I decided to follow the Yum Blog recipe. I used half litre of milk to prepare the khova and ended up with 3 tablespoons of it. I adjusted the quantity of ingredients accordingly and got 12 jamuns. Needless to say, we both finished it the same day. I am giving the measurements I used. So those of you, who are craving for jamuns and want to try in a small batch, here is the recipe for you.


You need

Khova - 3 tblspn

Maida - 1 tblspn

A tiny pich of soda

Milk - 1 tblspn (you may require )

Oil  - 1 cup to deep fry


For the sugar syrup

Sugar - 3/4 cup

Water - 1/2 cup

Saffron+cardamom syrup - 1 tspn

Rose essence - few drops


Method.

Preparing Khova is easy but time consuming. You have to continue boiling the milk till the solid residue is left behind. If you plan to make khova, make sure you have plenty of time to spare. While making khova for jamuns, stop the cooking when the khova is moist and not too dry.

Mix khova , maida and soda. Don't knead it too much. If the mix is dry, add few drops of milk and bring the dough together. Divide the dough into12 portions and roll them into balls. Don't press hard while rolling. Else the inner portion will not get cooked properly and later doesn't soak in the syrup well.

Heat oil in a kadai. Don't heat it to smoking point. When the oil is moderately hot, carefully drop the balls into the oil and fry the jamuns till golden brown in medium heat.


Meanwhile prepare the syrup by heating sugar and water. The syrup should be slightly sticky to touch. If you have saffron add it along with powdered cardamom and few drops of rose essence. I have the saffron cardamom syrup with me. So I used that. Adding saffron is purely optional.

Drop the fried jamuns in the warm syrup. You can add the drained jamuns directly to the syrup. After one hour, the jamuns must have soaked in the syrup and is ready to serve. You can chill and serve or serve warm with a side of vanilla ice cream.